Once Upon A Cold Brew
Starbucks who??
Actually, I am a fan of a few of their drinks. This cold brew that we have been making though, not only has it diminished my trips to Starbucks, but, it is sort of like a fairy tale. From the very beginning, when you first open that bag of coffee beans (or grinds, if you do not have a grinder), the aroma that escapes the bag – it is like it is casting a spell on you as it pulls you in. And those beans, they must be magic beans, because no other drink (or potion 🙂 ) can do what one sip of coffee can do – completely bring you back to life!! Personally, I think Jack should have traded his cows for coffee beans! And it is so easy and quick, there is no reason for you to ever have to go without! In fact, a batch of this could possibly turn that evil stepmother into, I don’t know…a really nice stepmother 🙂 It is that good!
All you need to make this cold brew is a mason jar, cheesecloth, a coffee filter, coffee, water and about 5 minutes to put it altogether.

Start with your coffee beans. If you have a grinder, you can grind them a little coarse if you prefer. Pre-ground works fine for this recipe though, because you are going to pour it through a filter at the end. Use whatever brand of coffee you enjoy – it is not going to be bitter when you drink it. Today, I am using Starbucks Italian Roast, because, I really do like their coffee.
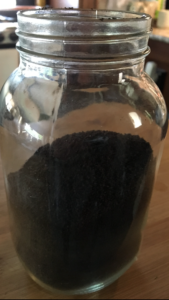
Using a 1 quart mason jar, measure 2 cups of coffee into it. It should almost half fill your mason jar.
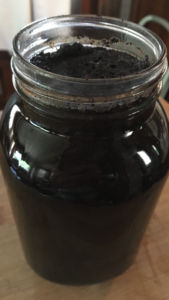
Next, slowly pour 4 cups of cold water into the jar. You are going to want to pour slowly, because otherwise your grinds are going to flow over the top of the jar. I usually have to stir the grinds around a little bit during the fourth cup, to make room. It will be very full, but it does all fit.
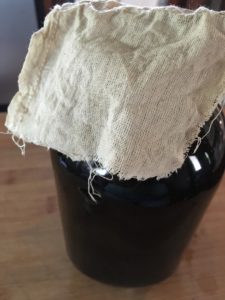
Once you have your grinds and water in the jar, use a piece of cheesecloth to cover the top of the jar. This is so the coffee can “breathe”. I had a little cheesecloth bag for mulling spices (unused), that I cut in half. It covers the top perfectly.
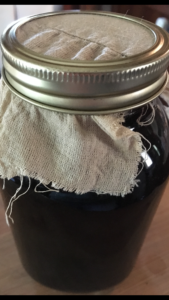
Place the band over the cheesecloth, and tighten.
Set out of the way on the counter for about 8 hours, or overnight.

After you have had a good nights sleep, you can get up, and you are ready to finish your batch of cold brew!
You can do this part a couple of different ways, whichever is easiest for you. The grinds are going to be thick near the top of the jar, with all of the brew at the bottom. I find it easiest to first pour all of it through a small, fine strainer into a pitcher. I start by scooping the grinds off of the top and dumping them into the strainer. Even though they seem like they are pretty dry, they still have liquid that will come through the strainer – this way you do not waste ANY of it! Once you have removed the top portion of the grinds, you can now pour the remainder of the jar into the strainer. Using a spoon, press and stir the grinds around until all of the liquid has passed through the strainer. Discard the grinds.
At this point, I rinse the jar out because I am going to use it to store the cold brew in the refrigerator.
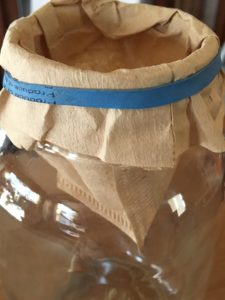
Using a paper coffee filter, place the filter down into the jar, folding the edge over and securing it with a rubber band (you could also use the jar band).
If you decided to skip the strainer and pitcher in the last step, you could spoon your grinds into the paper filter at this point, until you are able to pour the liquid. By doing it this way, you may have to use a second paper filter, as it will fill up with all of the grinds. But it does work.
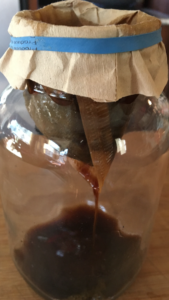
Slowly pour the liquid through the paper filter. Most of the grinds will have been caught in the strainer, but the filter will remove any fine grinds that may be left. This is especially helpful if you have used pre-ground coffee in the beginning.
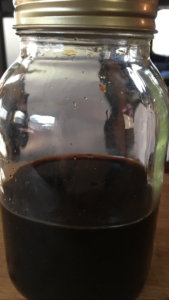
You are now ready to put the lid on the jar and place your cold brew in the refrigerator until you are ready to drink it!
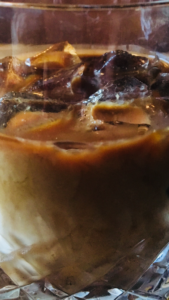
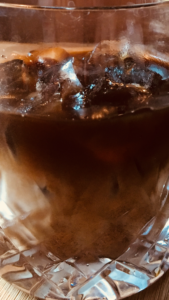
To enjoy, simply pour over ice cubes. It is a concentrate, so you will want to add either water, or creamer. I, personally, like to pour about a half cup of concentrate over ice, and then add a half cup of coconut milk creamer to it. It makes a nice rich, very slightly sweet, refreshing cold brew!
If you have more than one mason jar sitting around, make a couple of jars of concentrate. That way, you can always have one jar ready for use in the refrigerator, while the second one is being prepared on the counter. This will ensure that, not only will you always have a batch of cold brew handy, but everyone will be able to live more “happily ever after”.
The End.
2 Comments
Char
Sounds delicious!! And just like toddy coffee.
Kathy
It is sooo delicious! I am not familiar with toddy coffee…I need to know what I am missing out on! 🙂