Christmas Basket Recipes for 2023

The time for Christmas basket baking was here before we knew it this year. I had hoped to get a lot of new recipes in the baskets this year, but our year had other plans. While there always seem to be treats that get requested each year from previous years, I had hoped to try out a lot of new additions. Time got away from us though, and we didn’t add much new this time. In addition, jellies, jams and other canned goods did not get added. In spite of of all of this, the baskets remained a hit amongst their recipients, and we were quite happy with the way they turned out!
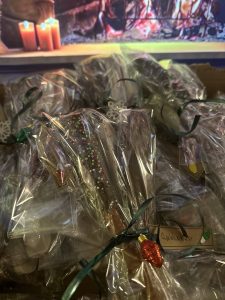
Char-cookerie Boards
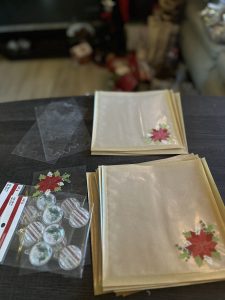
The “basket” part of the baskets that were hand delivered, were set up as a charcuterie board. Thick, wooden cutting boards were filled with baked goodies and decorations.

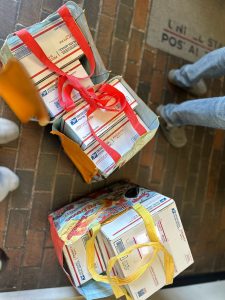
We had a couple of additions this year to our list of people we mail to, and while we couldn’t accommodate the shipping boxes with the boards, we were still able to decorate the packaging and send a box of festive goodies!
The Recipes
New this year:
Buddy Bark
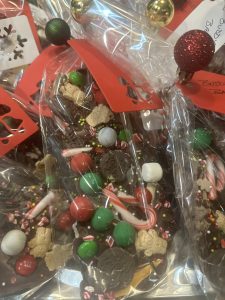
My idea to create Buddy Bark was actually inspired by the Movie Elf! The scene where Buddy is putting all of the candy and sugar on top of his spaghetti, made me think it would make a fun Christmas basket addition – minus the spaghetti!
Ingredients:
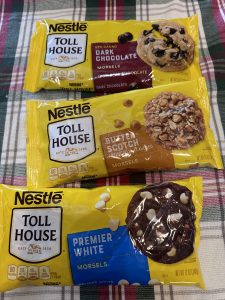
Candy morsels (I used Toll House in a variety of flavors – dark chocolate, white chocolate and butterscotch. I also made a solid dark chocolate.)
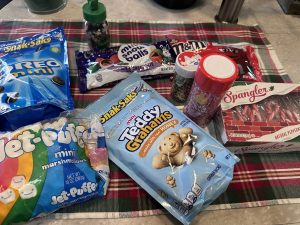
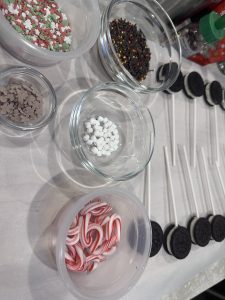
Toppings – You can use any type of topping that you like. I used a mix of both candies and cookies- M&M’s, Mini Snowballs, Mini Marshmallows, Mini Candy Canes, Mini Oreos, Mini Teddy Grahams, assorted Christmas Sprinkles.
Directions:
I used a foil cookie sheet to make the Buddy Bark – it doesn’t stick to the pan and is easily popped out when cooled. The pan can be re-used.
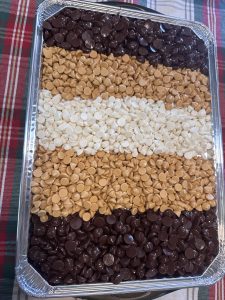
Pour the morsels onto the pan. I put mine in sections, but you can mix them all if you want (I might actually do that next time).
Place the pan in the oven which has been set to 200 degrees. You want the morsels to melt, but not cook or burn. Watch them carefully. When they all look shiny, but are still holding their shape, remove them from the oven.
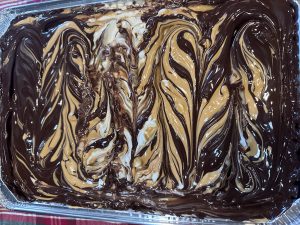
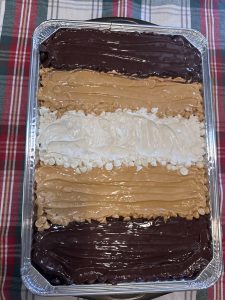
Using a spatula, gently mix the melted morsels. I swirled my flavors all together so that there would be a mix of flavors in the finished bark. If you have a few morsels that didn’t melt completely, that is okay as it will blend in with the candy toppings anyway.

While the morsels are still melty, sprinkle all of your toppings onto the pan.
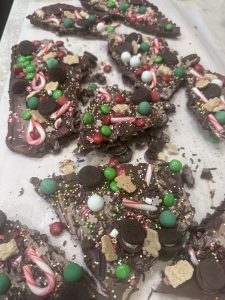
Let the chocolate harden and dry completely. Gently break apart into chunks, and place in airtight container or treat bags.
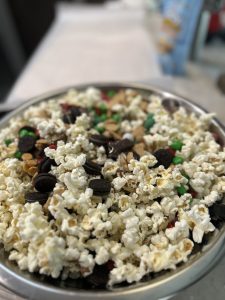
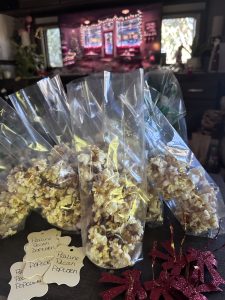
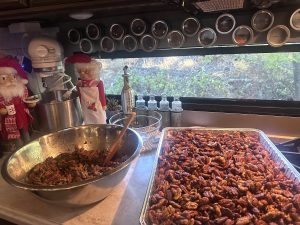
Christmas Candy Crunch
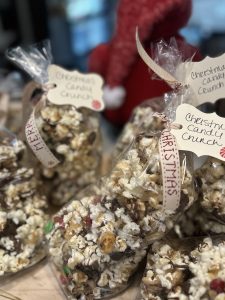
I had a small bowl of toppings left over from the Buddy Bark and didn’t want to waste them. I decided to add them to the Praline Pecan Popcorn that I was making to add a bit of festive to it! It turned out to be a hit!
Ingredients:
2 bags of popcorn (I used Orville’s Natural with Sea Salt)
1 cup butter
1 c sugar
3 tablespoons water
1 teaspoon light corn syrup
1 bag Praline Pecans
Assorted candy and cookie toppings (I used leftover toppings from Buddy Bark)
Chocolate candy melts
Directions:
Make popcorn according to instructions. Place popcorn, pecans and candy toppings into a large bowl.
Next, make the toffee.
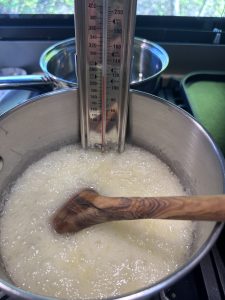
In a medium pot on the stove, add the butter, sugar, water and corn syrup. On medium heat, stir until well combined and butter is melted. Attach a candy thermometer to the side of the pot after the butter has melted. Once the mixture begins to boil around the edges, turn the heat up. Stir constantly as it boils rapidly, making sure to scrape bottom of bowl so the mixture doesn’t burn. Continue boiling until the thermometer reaches the soft crack stage. Once it reaches the soft crack stage, remove from heat and quickly pour over the popcorn, nuts and candies. Stir with a large wooden spoon (the mixture will be very hot).
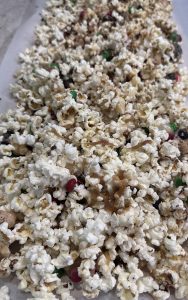
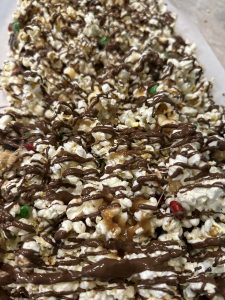
Spread the popcorn mixture, while still hot and sticky, out onto a large piece of parchment paper. Drizzle with chocolate. When toffee cools and hardens, you can break popcorn apart. Store in an airtight container, or place in treat bags.
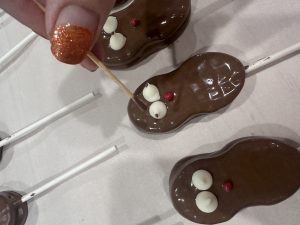
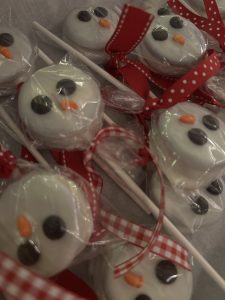
Reindeer Cookie Pops and Hot Cocoa Cookie Pops
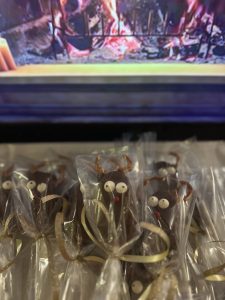
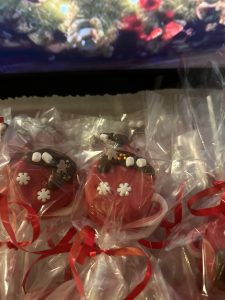
The Snowman Cookie Pops were such a favorite last year (and fun to make!), that I decided to try a couple of new cookie pops this year as well!
Ingredients:
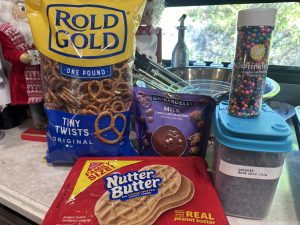
Oreo Cookies (this year I used the Mega Stuffed and they worked great!)
Nutter Butter cookies
Melting wafers (I used white chocolate, chocolate and red)
White chocolate morsels
Pretzels (I used Rold Gold Mini Twists) – broken into pieces.
mini candy canes (break at the curve)
mini candies (optional for the cocoa cups – I used mini gingerbread men, mini marshmallows and mini snowflakes).
Lolli pop sticks
Directions:
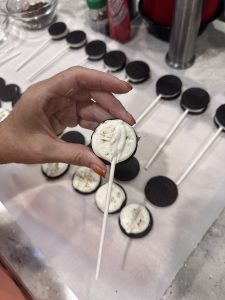
Just as for the snowman pops, remove one side of the cookie.
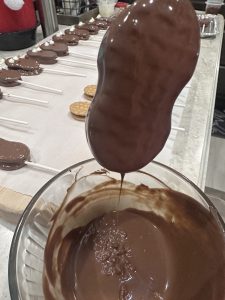
Dip a lollipop stick in melted chocolate (I used white chocolate for the Oreos and brown chocolate for the Nutter Butters). Press lollipop stick into the creme filling for the cookie, replace the cookie wafer. Do this for all of the cookies you are making. Let the sticks harden inside the cookies.
Once the sticks have hardened, melt the melting wafers (a mason jar works great for this). Dip the Oreo cookies in the red melted wafers and the Nutter Butters in the brown chocolate melted wafers.
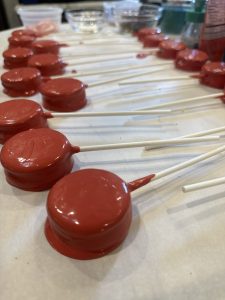
For the Oreos-
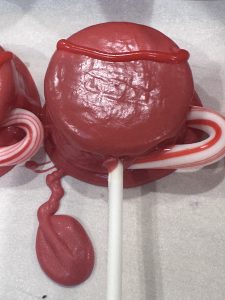
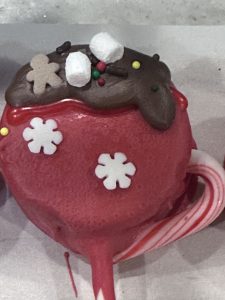
While still wet, press a candy cane hook into the side of the cookie. Let the Oreos dry. Once they are dry, using melted brown chocolate, pipe the chocolate on the top of the cookie so that it looks like hot cocoa. Place a few mini candies into the “hot cocoa”. Using melted white chocolate, pipe a few dots onto the cookie below the “hot cocoa” and place a snowflake or other decoration to decorate your “mug”. Let dry completely before packaging.
For the Reindeer-

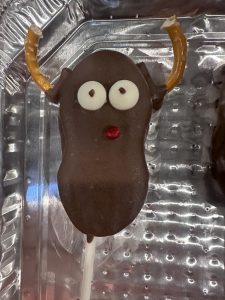
While still wet, press 2 pieces of pretzel into the top of each cookie. Place 2 white chocolate morsels for the eyes. Place a red candy for the nose. Using a toothpick, put a dot of brown chocolate on the tip of each “eye”. Let dry and harden completely before packaging.
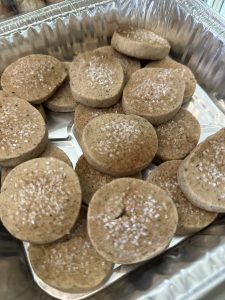
Cinnamon Walnut Biscotti
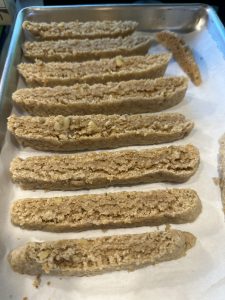
Biscotti is another favorite of mine to make! The combinations of flavors that you can mix together is really endless. I like to choose flavors that seem like they would pair well with a cup of hot coffee or tea. Cinnamon Walnut hit the mark this year!
Ingredients:
1 cup walnuts
1/2 Cup Butter – slightly melted
1 teaspoon vanilla
1 Cup Sugar
1 Tablespoon cinnamon
2 Eggs – room temperature
2 1/2 Cups Flour
1 1/2 Teaspoons Baking Powder
3/4 Teaspoon Salt
Directions:
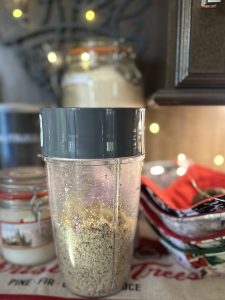
In a food processor or blender, blend the walnuts until fine. Set aside.
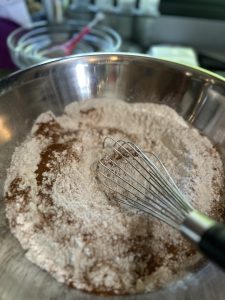
In a large bowl, add flour, sugar, cinnamon, baking powder and salt. Whisk together.
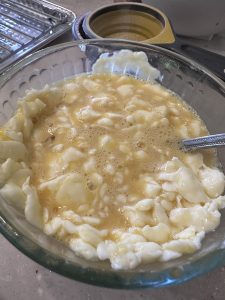
In a small bowl, slightly melt butter. Whisk in egg and vanilla.
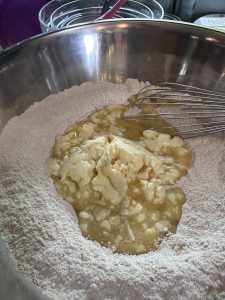
Add to flour mix and gently stir just until combined.
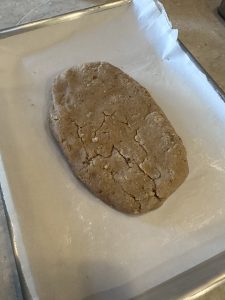
Add walnut. Knead by hand until a stiff dough forms. Divide dough into 2 sections. Pat each section into an oblong disc about 10 inches long and 4 inches wide, and place on cookie sheet.
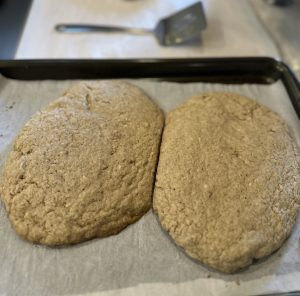
Bake at 350 degrees for 30 minutes. Remove from oven and let cool for 15 minutes. Slice each loaf into 1 inch slices. Return to oven for 15 minutes. Remove from oven and turn each slice over. Return to oven for 15 more minutes. Remove from oven and cool completely.
Repeat recipes from previous years:
For the following recipes from 2022, click here
Chai Spice Shortbread Cookies
Oreo Snowman Pops
Praline Pecan Popcorn
For the following recipes from 2021, click here
Dipped Turtle Pretzels (chocolate/caramel)
Dipped Peppermint White Chocolate Pretzels
Lemon White Chocolate Biscotti
For the following recipes from 2020, click here
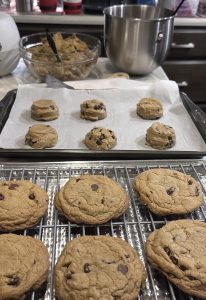
Giant Chocolate Chip Cookies
Giant Peanut Butter Cookies
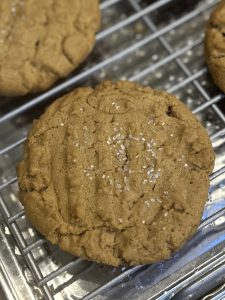
Giant Molasses Cookies
Spiced Nuts


Caramels 3 ways –
Regular Caramel
Sea Salt Caramel
Espresso Caramel
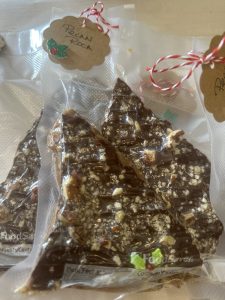
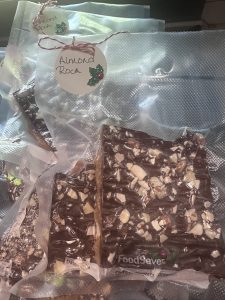
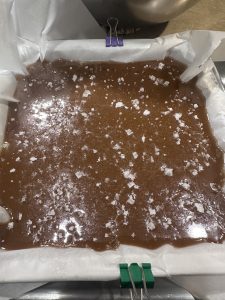
Almond Roca and Pecan Roca
As always, we hope you enjoy your goodie baskets as much as we enjoy making them!
Merry Christmas!
4 Comments
Cindy
I can’t thank you enough for the delicious treats!!! (I did not share well with others. lol lol) You are amazing and I am beyond honored to have been a recipient of your goodies! Love you!!
Kathy
Awe, Thank You!! That means a lot!! 🙂
Char
The hot cocoa mugs were SO CUTE!
Kathy
Thank you! They are really fun to make!